This Post will show my disassembly process as well as screenshot of main components and tips and tricks.
The main structure of the Tivoo is not glued, it consist of some snap locks and screws.
The first step is to remove the knobs, there are two knobs in the unit, those you just need to pull with a bit of force and they will slide of, they are held in place only by pressure and friction so very safe to remove.

Second step is to remove the plastic faceplate. This is the trickiest part, as the face plate is attached with latches.
In the next picture I highlighted the latches.

To start disassembling the device, I started from the knob corner moving up using a guittar pick.

Once the faceplate is removed, the tivoo looks like this.

After that the tivo screen is composed of 4 components.
*Glass
*Diffuser panel
*ligth mask
*led array
The following images is the device after removing the Glass

The following image is the device after removing the diffuser

The following image is the device without the grid mask.

Here are the images of all the 4 components of the screen.

Here is other shot of the LED display turned off.

To continue the disassembly process, we need to remove some 6 screws pointed in the next screenshot.

from this point the screen is just held in place by friction against some panne like material. to extract the screen I used one screw driver in one of the holes and pulled as follows.

After that you can just unplug the two wires, the big one is power and data, the small one is the microphone.

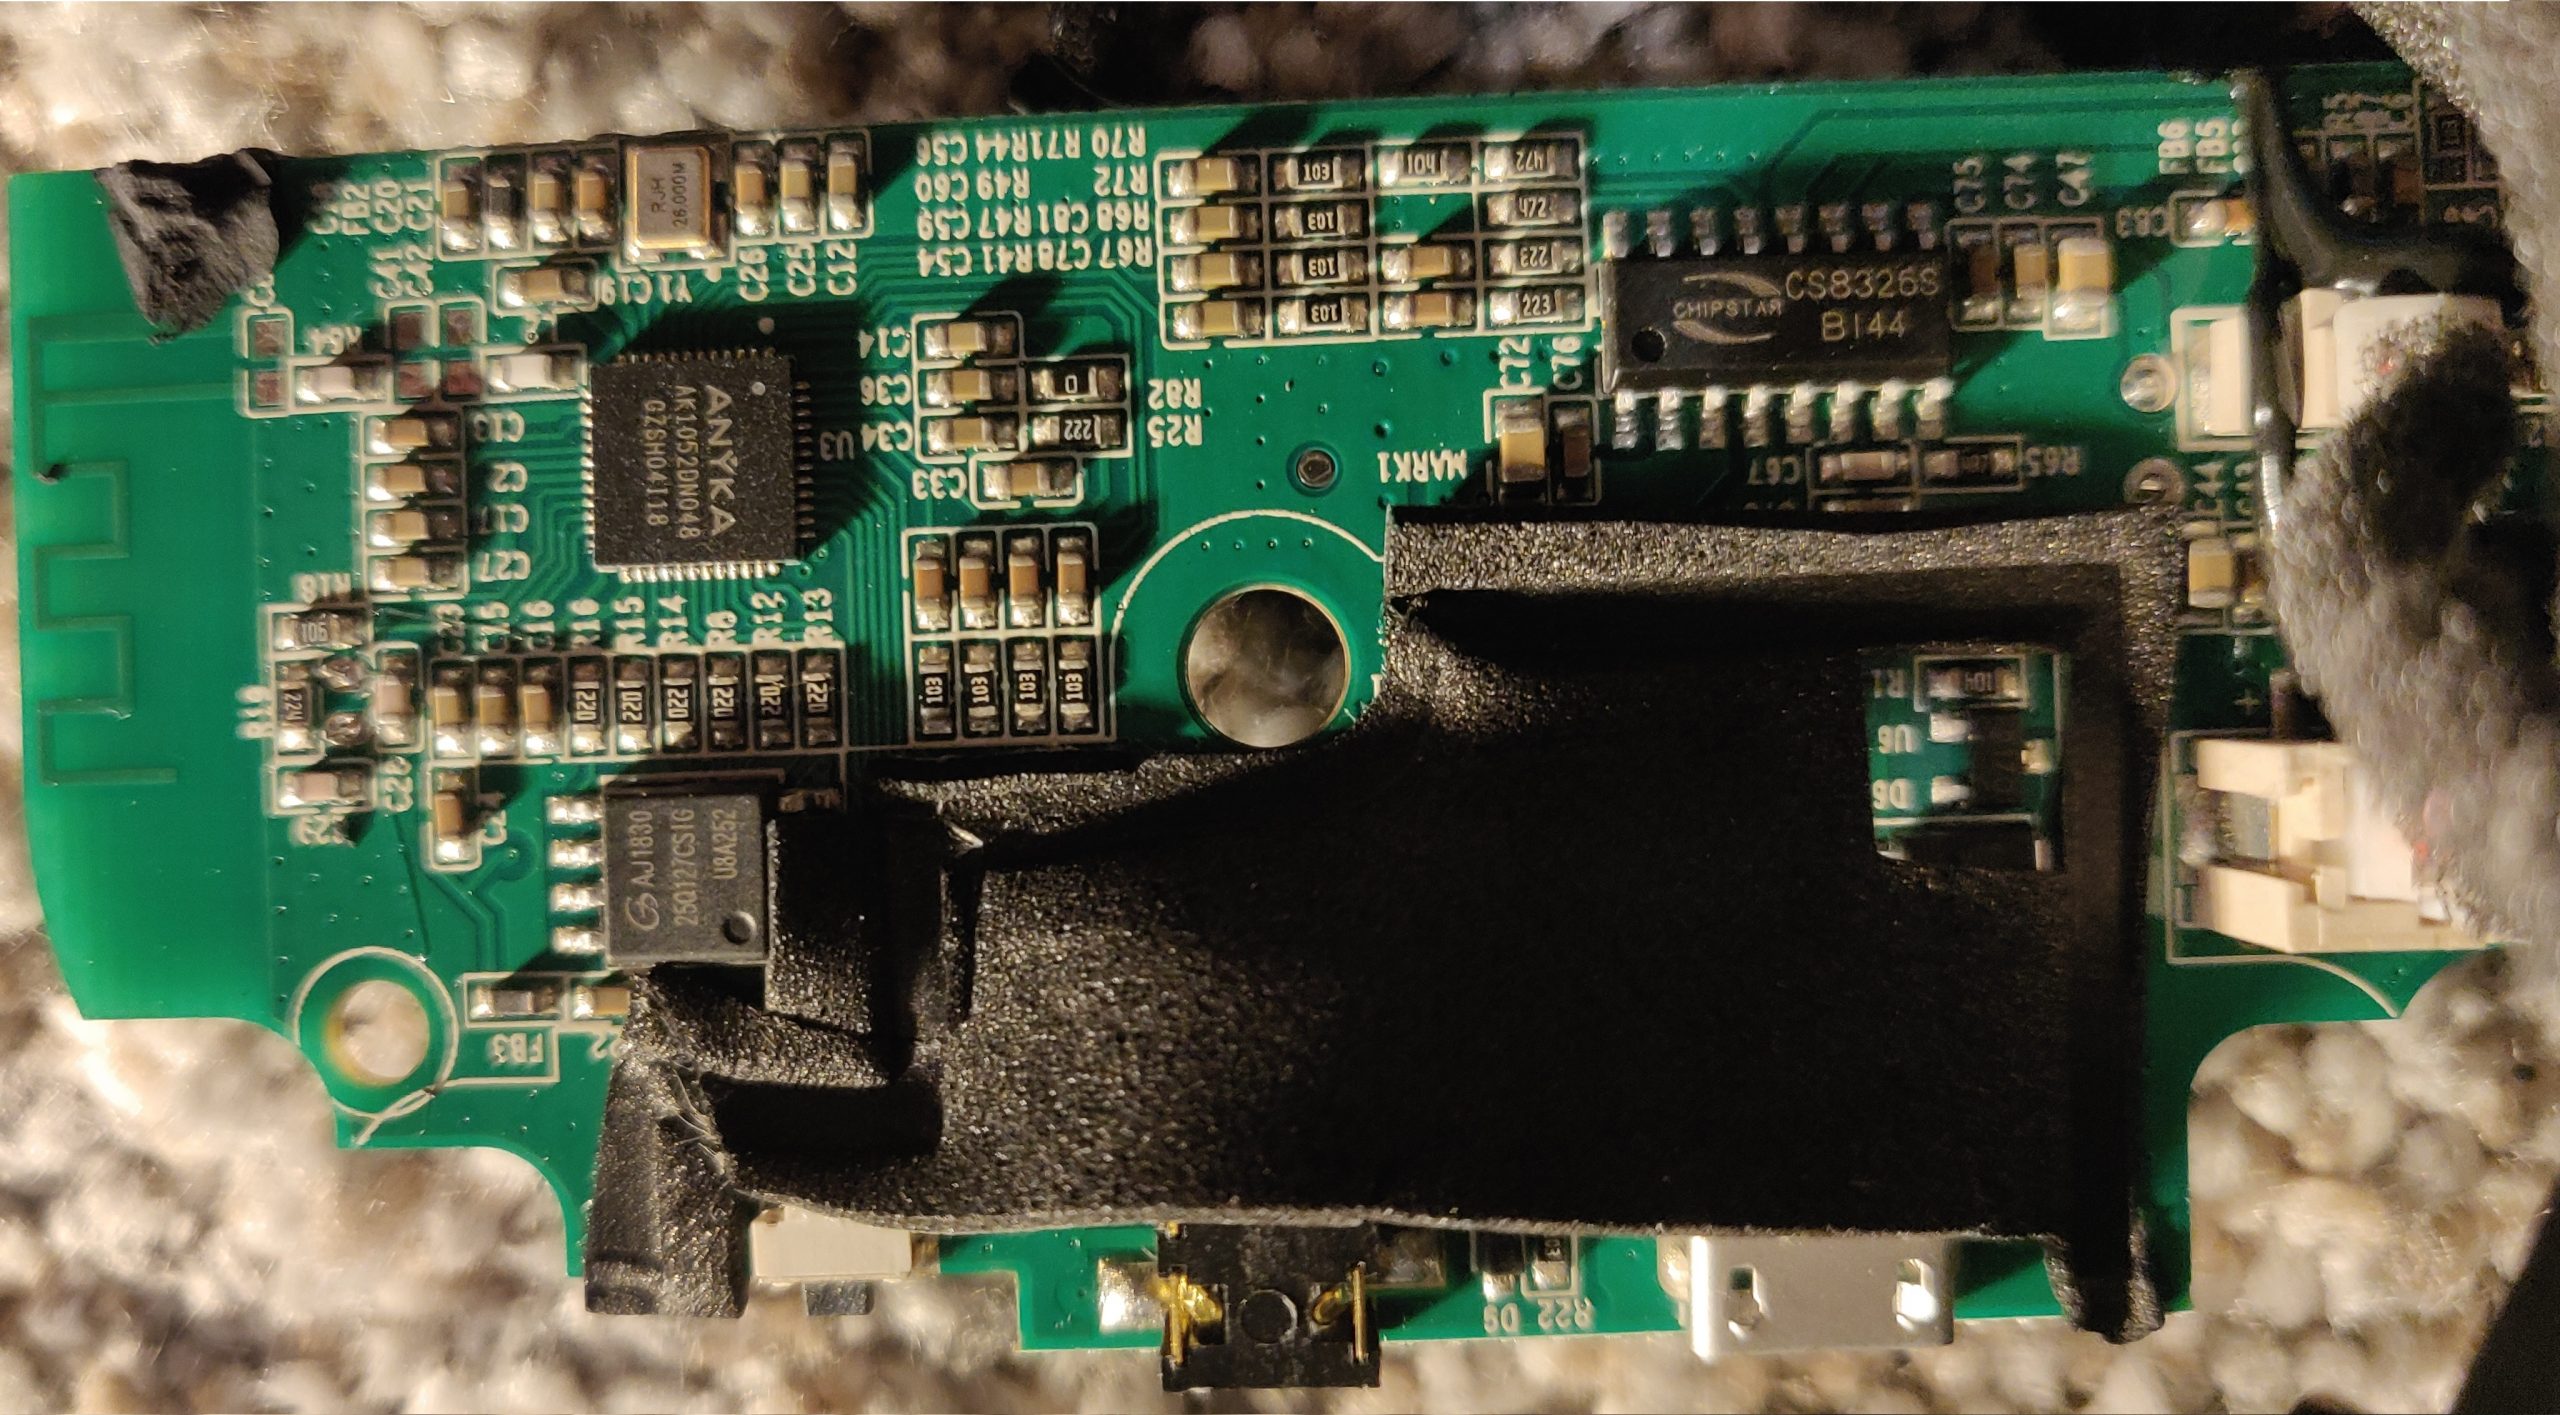
Here is another picture of the main board of the screen. (The following picture is highRes so you can see the components.

In the case you can see the main battery (a lithium 18650 w 3000mah), the speaker and another board behind the battery (hard to see). You will also see other two screws that need to be removed to continue with the disassembly.

After that you can remove the inner assembly from the outer case.

Now to open the inner assembly you need to remove itehr 4 screws.

After that you will need to remove other three screws that attach the circuit boar to the assembly and unglue the battery.
To Remove the battery I just gently moved until the glue broke. Also note that the board itself have some of the same glue, so you will need to pull it gently until the glue gives up after removing the 3 screws from the picture.

Here you can see the board separated from the assembly.

Next Here I add some high resolutions from the front and back of the circuit board.

That will be all in this entry, thanks
Note: to see high res in your phone you may need to switch to desktop site mode.
I just wanted to ask, if it can work off the mains with the battery removed?
I received a tivoo as a gift – it’s a nice design, minus the non removable battery. The battery seems to be a weak point, in that it doesn’t last long. I think it’s marketed as having 5-6 hours of battery life, but from my experience that’s definitely not taking into account listening to music (after one hour at low volume, I’m down to 50 percent). Obviously there will always be a small proportion of defect devices, but the number of battery issues suggests cutting corners. Some reviewers note their device sparking up or smoking.
One user claims to have disassembled their tivoo and found it had no battery protection in it’s circuit, although the next page of your breakdown does suggest otherwise (of course, whether it’s effective or not is something else). I believe Divoom also noted that some of their devices weren’t compatible with fast chargers, as a response to reviews stating their devices were no longer working after a year or less.
Mine is still working fine after a year, (i have it conected to the charger most of the time and i still get like 3 hours of music with the battery when friends come by). Not sure if it works without the battery, I assume it would. in any case you should be able to buy a 18650 lipo replacement and change it if you are having issues with it.
Update: seems when you remove the battery, the charging ic detects an open circuit and interpret it as undervoltage battery and either tries to tricle charge it or throws an error. Thus, seems is not possible to run the unit without a working battery.
Your posting is great. I was really curious about the inside of the tivoo. I have a minor problem with my tivoo. I’ve tried to put a pin to reset it but the pin was just got into the hole without any stop. Would you be able to how the reset hole and an inner button to reset is designed?
This is an interesting case, seems the first revisions of the TiVo had a reset button, however at one point tey replace it with a battery light. Mine does not have the reset button. Basically if you see a charging light in the reset hole when you plug in the charger then you don’t have the reset button either.
Thank you very much for this tutorial I was able to change my battery even if it does not last long I love the quality of sound and the alarm function, it’s my alarm clock for 5 years and thanks to you I was able to change the battery, I use it connected to the mains via USB cable thank you and happy new year 2022 I wish you health, im a french fan ?
I have same issue. Wont turn on or do anything.
However, when I hold down power button while connecting it to power source. Than it seems to work and connect to bluetooth source just fine. Since it is just eye candy on my desk keeping it plugged into USB port on PC is no big hassle.
Thanks for the info though….Always good to learn.
6/21/22
I disassembled my Divoom Tivo and
something is afoot with the battery.
The blue shrink wrap around the battery displays
“3.6V 3000mAH 10.8wh ZY-18650-1P-hyy201911v13”
However, the green battery underneath the wrap displays
“INR18650 S-2500mAH 3.6V 9.0wh UN1N021EMB 210070”
What gives here?
The official product description points to 2500 mAh. I guess you can ignore whatever the blue wrap says.
Thanks
Thanks very much. This has been a life saver. I replaced the battery with one with an inbuilt protector circuit, hopefully this will protect the over-discharge issue. Now to repair the other two! ?
Ciao mi chiamo Pino. Il mio Tivoo è diverso a quanto pare. La scheda madre, il lato dove c’è il led di ricarica, al mio ci sono tre componenti che non vedo nelle vostre foto, un Mosfet 65 D e due transistor 1 AM PNP. Ho un problema, credendo che il foro dove si trova il led di ricarica, era per fare un Reset, ho infilato l’ago e non si è più accesa. Io credo che si sia bruciato uno di questi tre componenti. Non riesco a capire come avviene l’accensione, quale componente mi avvia il dispositivo. Simulando un corto tra due di questi si avvia, ma non si spegne. O forse può dipendere dal integrato XB, di protezione? O forse FP 8102 8 pin per la ricarica e stabilizza la corrente, in più è collegato al led di ricarica. Non sono riuscito a capire come avviene il processo di accensione. Vorrei un aiuto. Grazie attendo conferma.
I was wondering if you could maybe help my with my Tivoo Lite.
For some reason it keeps randomly turning on and off every 2 to 5 seconds. And keeps doing it until the battery runs out.
I,ve seen that when the battery is bad, but if it is charging chances are the board is bad or the software is corrupt.